

Lập trình OpenCV C++ Bài 3: Tối ưu việc load ảnh
Hello. Chào mừng các bạn đến với chủ đề lập trình OpenCV C++
Chúng ta tiếp tục bài số 3: Tối ưu việc load ảnh bằng opencv
Sau khi thực hành bài số 2, các bạn đã load được ảnh lên trên view

Chúng ta sẽ thực hiện một vài kỹ thuật để việc tối ưu ảnh nó tốt hơn
1. Thực hiện loại bỏ view cho sẵn.
Vì khi các bạn open một tấm ảnh, nó tự động tạo ra một view và đẩy hình ảnh lên view đó,
Do đó view cho sẵn ban đầu chúng ta không cần đến nữa, chúng ta sẽ thực hiện ko cho nó được hiện lên
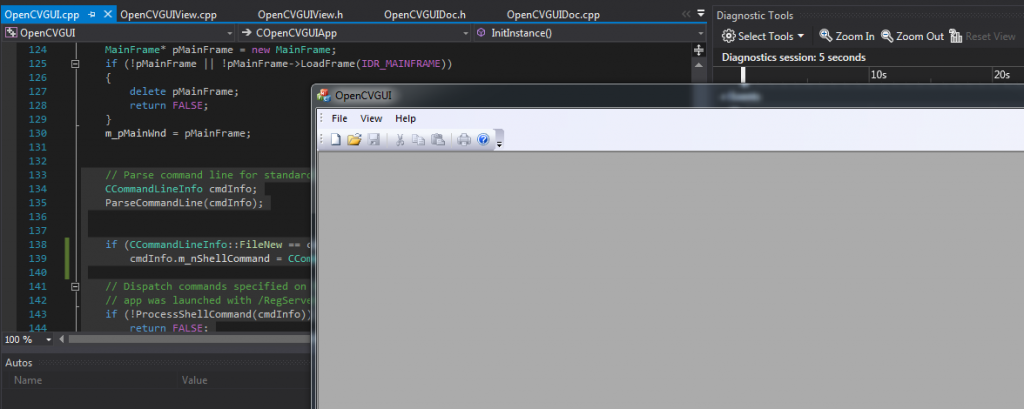
Các bạn mở file COpenCVGUIApp tại hàm : InitInstance, thêm hai câu lệnh sau:
if (CCommandLineInfo::FileNew == cmdInfo.m_nShellCommand)
cmdInfo.m_nShellCommand = CCommandLineInfo::FileNothing;
	// Parse command line for standard shell commands, DDE, file open
	CCommandLineInfo cmdInfo;
	ParseCommandLine(cmdInfo);


	if (CCommandLineInfo::FileNew == cmdInfo.m_nShellCommand)
		cmdInfo.m_nShellCommand = CCommandLineInfo::FileNothing;

	// Dispatch commands specified on the command line.  Will return FALSE if
	// app was launched with /RegServer, /Register, /Unregserver or /Unregister.
	if (!ProcessShellCommand(cmdInfo))
		return FALSE;
	// The main window has been initialized, so show and update it
	pMainFrame->ShowWindow(m_nCmdShow);
	pMainFrame->UpdateWindow();

	return TRUE;
}
ok sau đó build và chạy thử, các bạn sẽ thấy không còn view nào xuất hiện nữa
2. Thiết lập một kích thước rộng hơn cho view
Các bạn thấy view đang nhỏ ơn so với hình vậy thì có thể thiết lập một kích thước rộng hơn cho view như sau
Trong lớp childFrame các bạn có thể setting size của windows tạo ra
BOOL ChildFrame::PreCreateWindow(CREATESTRUCT& cs)
{
	// TODO: Modify the Window class or styles here by modifying the CREATESTRUCT cs
	if( !CMDIChildWndEx::PreCreateWindow(cs) )
		return FALSE;

	cs.x = 100;
	cs.y = 100;
	cs.cx = 640;
	cs.cy = 480;
	return TRUE;
}
3. Đổi background đen của view sang background dễ nhìn hơn
Tại lớp view khai báo một biến thành viên CBrush m_brush;
public:
	virtual ~MFCOpenCV2View();
#ifdef _DEBUG
	virtual void AssertValid() const;
	virtual void Dump(CDumpContext& dc) const;
#endif

protected:
    CBrush m_brush;
protected:
	afx_msg void OnFilePrintPreview();
	afx_msg void OnRButtonUp(UINT nFlags, CPoint point);
	afx_msg void OnContextMenu(CWnd* pWnd, CPoint point);
	DECLARE_MESSAGE_MAP()
};
Sang file cpp tại hàm RenderImage chúng ta thêm như sau:
Trong khối block1 chúng ta thêm đoạn xử lý
// Create grid background for document
if (NULL == m_brush.GetSafeHandle())
{
m_brush.CreateHatchBrush(HS_DIAGCROSS, RGB(190, 190, 190));
}
CBrush* pOldBrush = memDC.SelectObject(&m_brush);
memDC.PatBlt(0, 0, rectClient.right, rectClient.bottom, PATCOPY);
void OpenCVGUIView::RenderImage(OpenCVGUIDoc* pDoc, CDC* pDC)
{
	if (pDoc)
	{
		//......................block 1..............
		CRect rectClient;
		GetClientRect(&rectClient);

		CDC memDC;
		memDC.CreateCompatibleDC(pDC);

		CBitmap bmpMem;
		bmpMem.CreateCompatibleBitmap(pDC, rectClient.Width(), rectClient.Height());

		CBitmap* pOldBitmap = memDC.SelectObject(&bmpMem);

		// Create grid background for document
		if (NULL == m_brush.GetSafeHandle())
		{
			m_brush.CreateHatchBrush(HS_DIAGCROSS, RGB(190, 190, 190));
		}
		CBrush* pOldBrush = memDC.SelectObject(&m_brush);
		memDC.PatBlt(0, 0, rectClient.right, rectClient.bottom, PATCOPY);
		/////////////////////////////////////////////////////////


		//......................block 2..............
		//Insert image into document
		const int cx = rectClient.right;				// view client area width;
		const int cy = rectClient.bottom;				// view client area height;

		const int bx = pDoc->m_Mat.cols;				// source bitmap width;
		const int by = pDoc->m_Mat.rows;				// source bitmap height;
Sau đó tại hàm hủy của lớp view, chúng ta thực hiện như sau
OpenCVGUIView::~OpenCVGUIView()
{
	if (NULL != m_brush.GetSafeHandle())
		m_brush.DeleteObject();
}
Build và chạy thử chương trình, các bạn sẽ thấy background của view sẽ dễ nhìn hơn
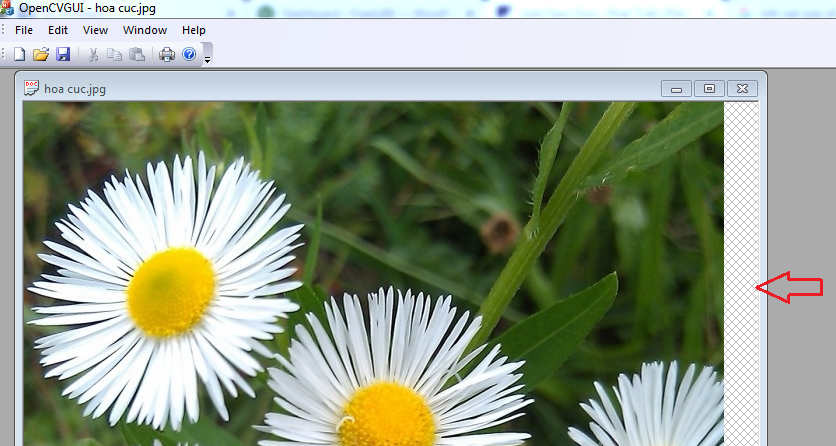
4. Một số tấm ảnh bị load nên thành đen trắng
Các bạn viết một hàm như sau tại lớp document
void OpenCVGUIDoc::ResizeMat(cv::Mat& mat)
{
    int nPadding = 0;
    if (CV_8UC4 != mat.type())
    {
        // padding is not needed for 32bit images
        nPadding = 4 - (mat.cols % 4);
        if (4 == nPadding)
            nPadding = 0;
    }

    cv::Mat matTemp;
    if (nPadding > 0 || !mat.isContinuous())
    {
        // Adding needed columns on the right (max 3px)
        cv::copyMakeBorder(mat, matTemp, 0, 0, 0, nPadding, cv::BORDER_REPLICATE, 0);
        mat = matTemp;
    }
}
Sau đó chúng ta sẽ gọi hàm này tại vị trí load ảnh.
Các bạn tìm đến hàm OnOpenDocument(LPCTSTR lpszPathName)
tìm đoạn code sau và gọi hàm ResizeMat(m_Mat)
 //Check image or video
 if (m_Video.get(CV_CAP_PROP_FRAME_COUNT) < 2)
 {
     //::PostMessage(pView->GetSafeHwnd(), WMU_SETFPS, 0, 0);
     m_Mat.release();
     m_Mat = cv::imread(nameStr);
     ResizeMat(m_Mat);
     SetupBitmapInfo();
 }
Ok, đó là các xử lý tối ưu cơ bản.